+84 862 765 053
Are you tired of using multiple coats of mascara or struggling with false lashes that won’t stay put? One beauty trend that has taken the world by storm is eyelash extensions. In this comprehensive guide, we will explore the mesmerizing world of eyelash extensions, covering the step by step perfect eyelash extensions process.
So, get ready now!
What are Eyelash Extensions?
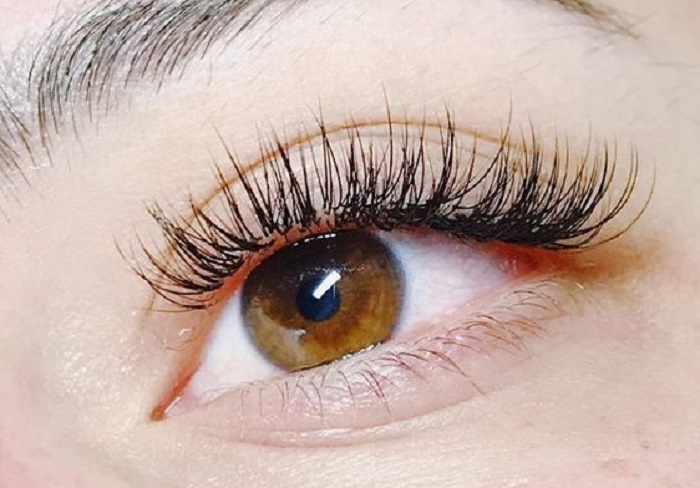
Eyelash extensions are a semi-permanent way to achieve longer, fuller and more alluring lashes. These synthetic, silk, mink fibers are carefully attached to your natural lashes, one by one, using a specialized adhesive. The result? A stunning and natural looking lash line that saves your time on your beauty routine and boosts your confidence.
What are the Types of Eyelash Extensions?
Indeed, the world of eyelash extensions offers a myriad of options to cater to different preferences and styles. Below are the four main types of eyelash extensions:
- Classic Lash Extension
- Hybrid Lash Extensions
- Volume Lash Extension
- Mega Volume Lash Extension
In addition to the different curl styles, lash artists can also customize eyelash extensions with various lengths, colors and materials. Whether you prefer classic, natural look or desire dramatic, eye-catching lashes, the world of eyelash extensions has something for everyone.
>> Read more:
- Classic Hybrid Volume Lashes – Unraveling the Key Differences
-
What is mega volume lashes? The difference between volume lashes and mega volume lashes
Get Prepared Before Eyelash Extensions Process
Preparing clients for eyelash extensions is crucial to ensure a smooth and successful eyelash extension process. By following these essential steps, you can create a comfortable and enjoyable experience for your clients, while also achieving beautiful lash results
Thorough Consultation: Begin with a detailed consultation to understand your client’s preferences. Discuss the desired style, length and thickness of the eyelash extensions. This step ensures you can tailor the lashes to suit their individual need and expectations
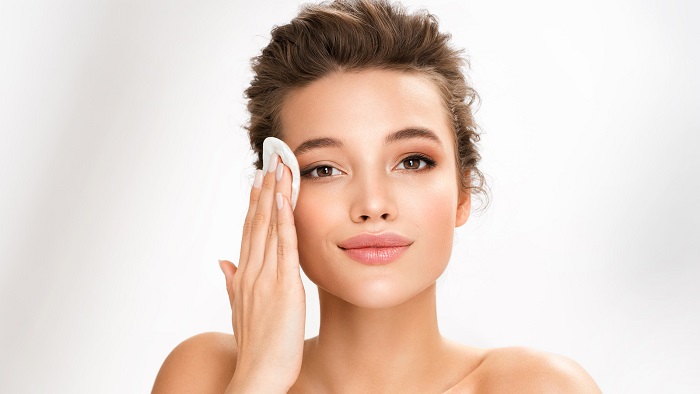
Remove Eye Makeup: Before applying the eyelash extensions, ensure the client’s eyes are free from any makeup. Use a gentle, water-based cleanser to remove any mascara or eye products. Drying the lashes with a lint-free cloth will create a clean surface for the application
Remove Contact Lenses: For comfort and safety, clients should remove their contact lenses before the lash application. This prevents any discomfort or potential eye damage during the process.
Allergy Questions and Waiver: During the consultation, inquire about any allergies the client may have. If needed, have them sign a waiver to ensure their safety and provide peace of mind.
By following these steps and providing a positive client experience, you can build trust and satisfaction, leading loyal clients who will keep coming back for stunning eyelash extensions.
Process of Eyelash Extensions Step by Step
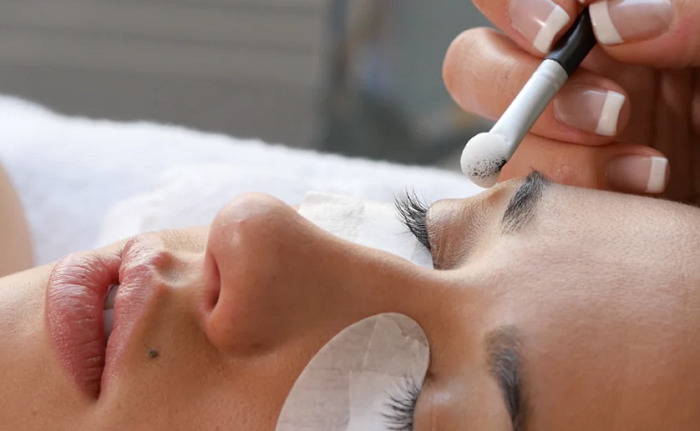
Step 1: Make sure client’s eyelashes clean
Ensuring the cleanliness of the lashes is crucial to maintain the integrity of lash extensions. By removing any makeup residue and excess oil, the adhesive that keeps the extensions in place can perform optimally.
>> We have compiled a list of top 4 lash cleansers you can’t miss here
Step 2:Use primer for the client’s lashes
Prior to attaching the eyelash extensions, using a high-quality primer is essential. This pretreatment enhances the bond between the lash extensions and the natural lashes, resulting in improved retention and longevity.
>> We have found a list of the best primers we recommend you use, see here: The Best Eyelash Primer – Stunning Lashes Revealed
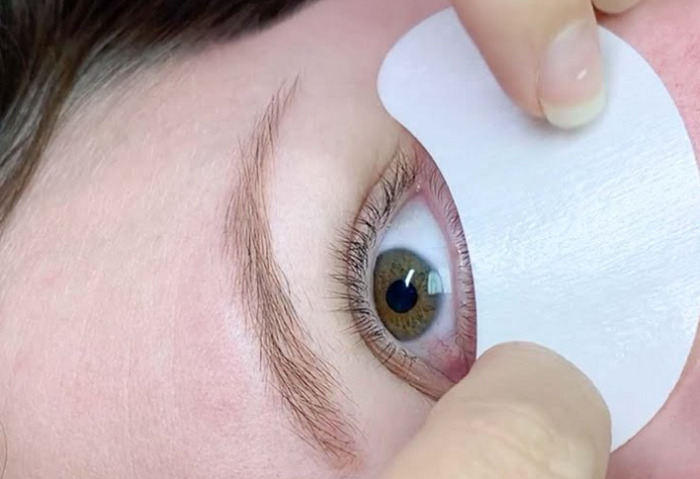
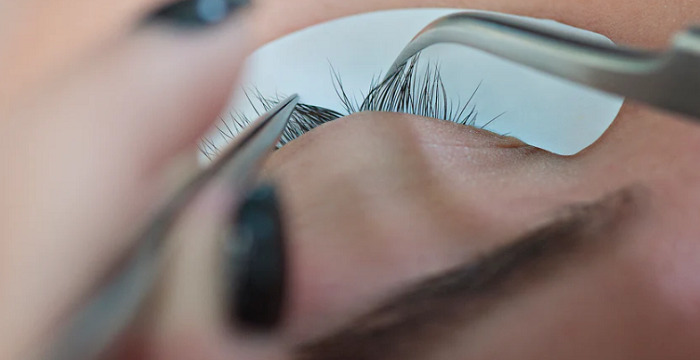
Step 3: Gently place the under-eye patches
When applying the under-eye patches, it’s important to exercise patience and precision. Be mindful of the lash extension isolation tweezers to avoid contact with the eye pads. Regularly check for any stray or bonded lower lashes to rectify the issue promptly.
>> Guide you on: how to properly apply under-eye patches
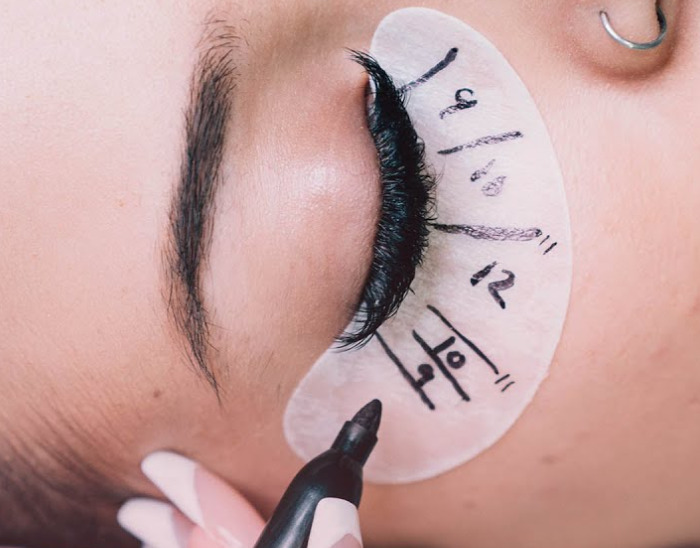
Step 4: Map out your eyelash extension set
Eyelash mapping is a time-saving technique that allows you to design the perfect array of lash extensions quickly and efficiently. This skill is valuable regardless of your experience level, enabling you to consistently offer top-notch lash extensions to your clients.
Step 5: Isolation the lashes
To achieve flawless lash extensions, remember to utilize both pick-up tweezers during the isolation process. By angling your isolation tweezer downwards towards the lashes and the pick-up tweezer upwards away from them, you can achieve a clear view and facilitate easier lash separation and positioning.
Do you find the technique of eyelash isolation too challenging? Read this article to learn how to improve your eyelash isolation skills: How To Improve Your Lash Isolation Skills In A Short Time
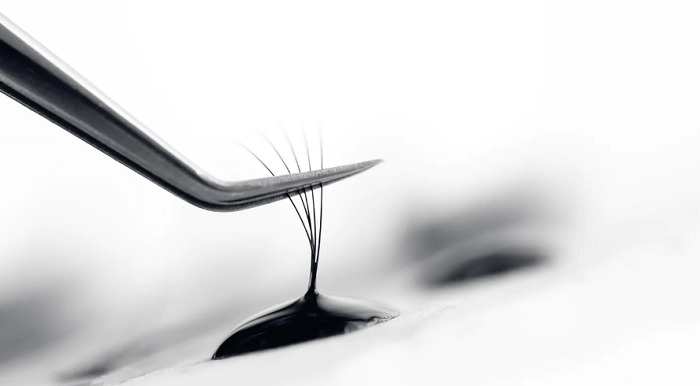
Step 6: Dip the lash into adhesive with care
Take the lash extension and slowly immerse its tapered end into the adhesive, being mindful of the perfect amount of glue needed. Striking the right balance between excess and insufficient glue is crucial to ensure optimal retention without any clumping.
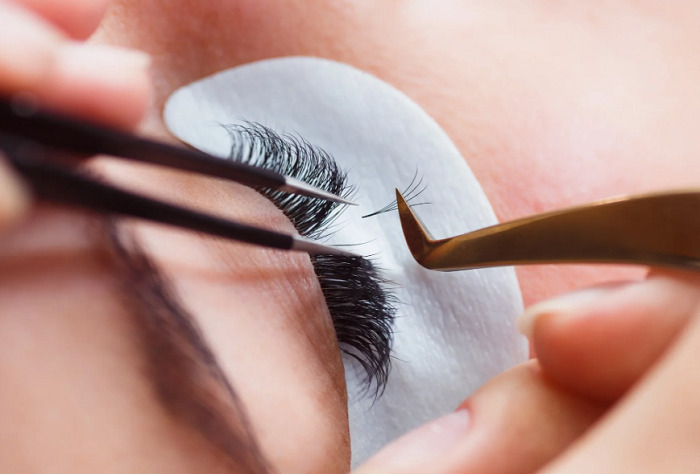
Step 7: Precisely separate and attach the extensions.
Skillfully isolate the natural lashes, smoothly gliding the extension alongside the individual lash using the wrapping technique. Apply the adhesive from the base to the tip of the natural lash, ensuring a seamless and gap-free attachment. Distribute the adhesive evenly for a flawless, natural look.
Step 8: Applying eyelash extension
Place the lash extension delicately onto the natural lash, ensuring just the right amount of adhesive is applied, approximately 1 mm away from the eyelid. Continue this meticulous process on the other eye or a different area, gradually achieving your desired lash design. This technique aids in avoiding any issues with lash isolation and prevents lashes from sticking together.
Step 9: Impeccable lash separation
Thoroughly inspect and ensure no lash extensions or natural lashes are adhered together. Utilize two sets of lash tweezers to gently separate any bonded lashes. Opt for a horizontal separation method, even if the adhesive is dry but not fully cured. Always exercise caution and avoid excessive tension or vertical pulling on the natural lashes. Reiterate the application and separation steps until each natural lash boasts a flawless bond with an individual extension.
Step 10: Allow the adhesive to set
Once all lash extensions are securely attached, allocate 3 to 5 minutes for the newly adorned lashes to dry. For improved retention, consider utilizing a super bonder to reinforce the adhesive bond. Employ a lash fan to aid in the drying process. After lightly misting the lashes with distilled water, allow them to dry for 3 minutes, and meticulously check for any residual stickiness.
Final Thought
In conclusion, the duration of an eyelash extension application process can vary depending on several factors. However, it’s essential to remember that this meticulous process is an investment in achieving the mesmerizing and captivating gaze you desire. I hope that we already found out the answer for yourself about the eyelash extensions process.
Visit our website for more useful information: www.vietnamlash.com