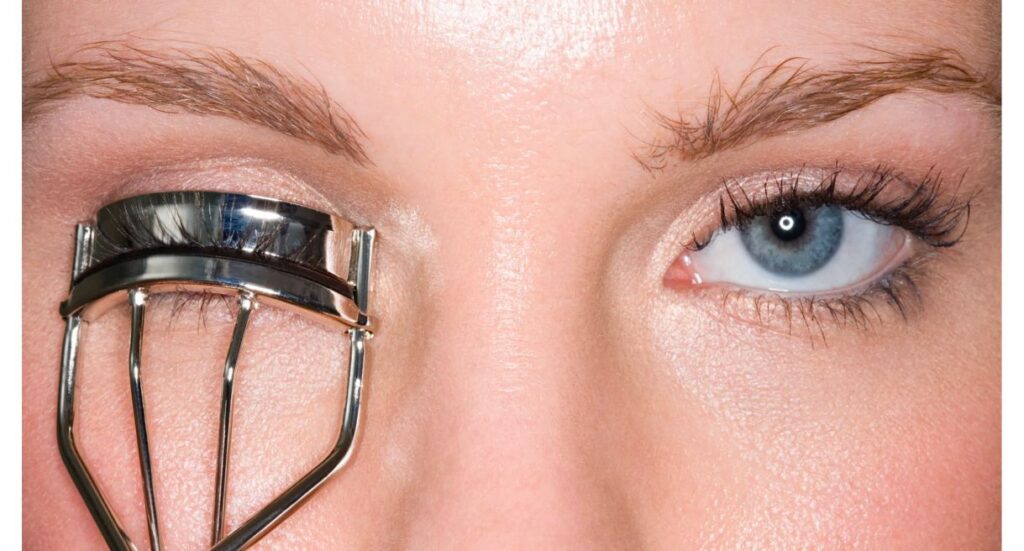
Hey there! If you’re like us, you probably use eyelash curlers to make your lashes look fabulous in the morning. They’re great for making your lashes seem longer and giving them a lovely lifted look. Whether you’re a pro at using them or a total newbie, we’ve got some tips on how to use an eyelash curler the right way and get the best results.
Do you use eyelash curler before or after mascara?
Let’s address the age-old debate: do you curl your lashes before or after mascara? Well, the smart choice is to curl those lashes before reaching for the mascara wand. I used to be on Team Mascara-First, but trust me, that’s a recipe for clumpy lashes.
Not only does it mess up your lash curler with leftover mascara gunk, but it can also cause your mascara to flake. Some mascaras dry really stiff, and when you curl your lashes after applying them, it can lead to flakes falling off. This misconception sometimes gives eyelash curlers a bad reputation, but it’s not the tool’s fault—it’s all about how you use it.
Aside from the clumpiness issue, there’s a horror movie scenario to consider: getting your eyelashes stuck to the curler and accidentally ripping them out. Yikes! Dry mascara makes lashes more brittle and prone to breakage. Even if you try to be extra careful, the consensus among experts is clear—curl before you coat.
How to Choose the Best Eyelash Curler
1. Consider Your Eye Shape
Considering your eye shape when learning how to use an eyelash curler is important.
Different eyelash curlers are designed to suit various eye shapes. Some are more curved, while others are flatter. Choose a curler that complements the natural curvature of your eyes to achieve the best results without pinching or discomfort. Try them out in a beauty supply store before making an online purchase; that’s your best bet.
2. Material Matters
Eyelash curlers are typically made of metal or plastic. Metal curlers are durable and provide a more precise curl, while plastic ones are often more affordable and gentler on the lashes. Consider your budget and personal preference when selecting the material.
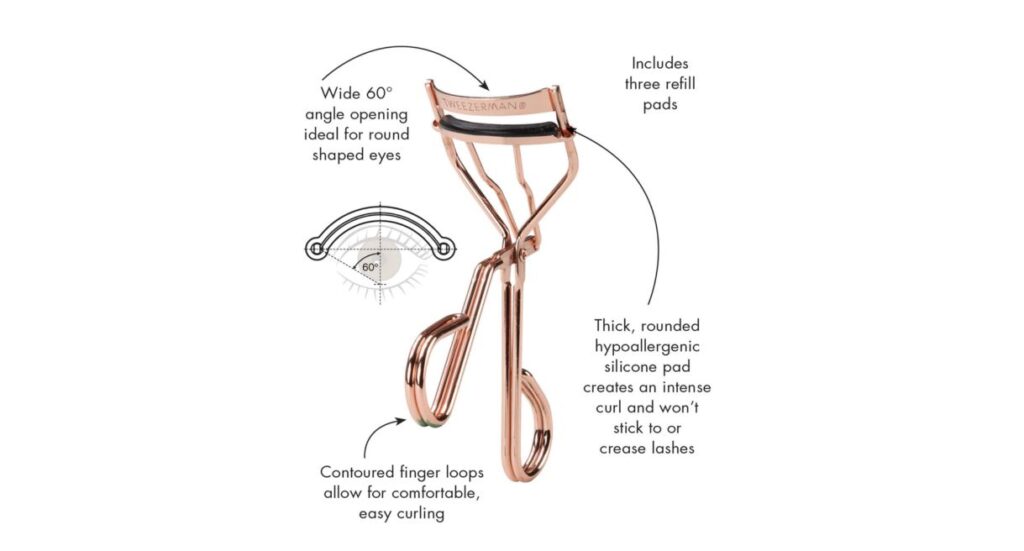
3. Rubber Pad Quality
The rubber pad inside the curler is crucial for a smooth and even curl. Pick a curler with a high-quality, replaceable rubber pad that grips the lashes without causing breakage. Regularly replacing the pad will ensure optimal performance.
Also, make sure that the curler you are using has a rounded rubber pad at its base. The ideal cushion should be softer and larger. In addition to making application more comfortable, this keeps your lashes from breaking under force.
4. Handle Design
A comfortable and ergonomic handle can make the curling process easier and more enjoyable. Test the handle grip before purchasing to ensure it feels secure and easy to maneuver.
5. Simple-to-Open Curlers
Moreover, confirm that the curler is comfortable to handle and that it opens and closes without difficulty. You don’t want to have to yank the curler open too forcefully since your eyelashes could become stuck on it.
6. Additional Features
Some eyelash curlers come with additional features, such as heat settings or built-in comb attachments. While these can enhance the curling experience, they may not be necessary for everyone. Evaluate whether these features align with your preferences and needs.
>> Check out more: Top 5 best eyelash curler for asian eyes you can not miss
How to Use an Eyelash Curler to Achieve Luscious Lashes
Getting those stunning, doe-eyed lashes isn’t rocket science, but there’s a bit of an art to it. Follow these easy steps on how to use an eyelash curler, and you’ll be rocking those fluttery, Bambi-like lashes in no time.
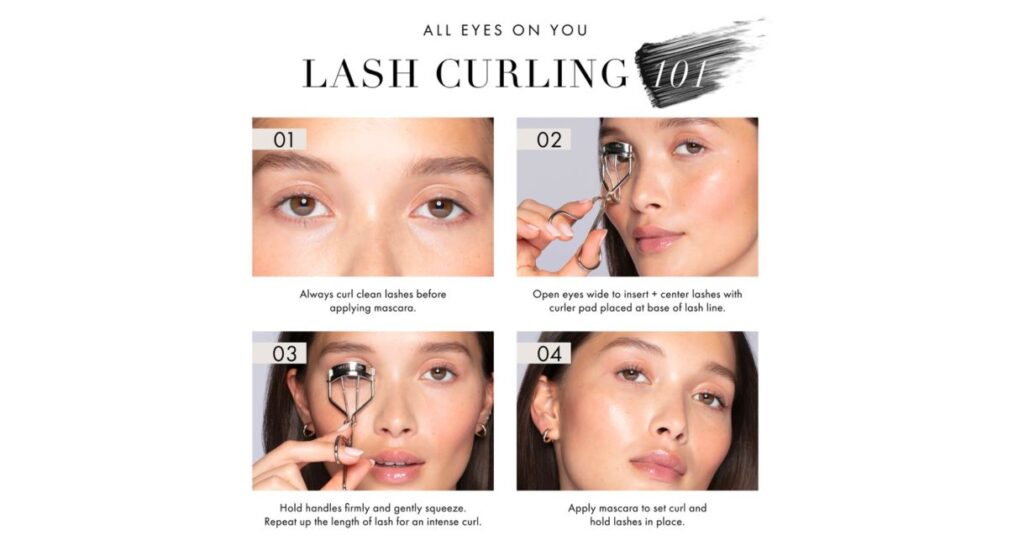
Step 1: Begin with Clean Lashes
Begin with clean lashes when curling your eyelashes to achieve the best results. Start by gently removing any makeup residue or oils from your lashes using a mild makeup remover or micellar water. This ensures a clean canvas for the eyelash curler to work effectively. And of course, make sure your eyelash curler is clean and free from any old mascara or debris.
Step 2: Look Down
To prevent accidentally nipping your eyelid, look down while using the curler. This provides better access to your lash line and minimizes the risk of pinching delicate eyelid skin. Safety first, people!
Step 3: Gently Clamp Down
Position the open curler near your lashes, ensuring they fall between the clamps. Gently clamp down, being careful not to catch any skin. If you feel a pinch, adjust the curler outward. The aim is to get close to the lash line without nipping the skin.
Step 4: Hold and Pulse
Press down gently for about five seconds, or use a pulsing rhythm for comfort. Repeat the process on the other eye. For fuller lashes, move the curler up away from the base and squeeze again in the middle. Finally, position the curler near the tips of your lashes and give it a final squeeze. This will provide a lifted effect, making your lashes appear longer and more voluminous.
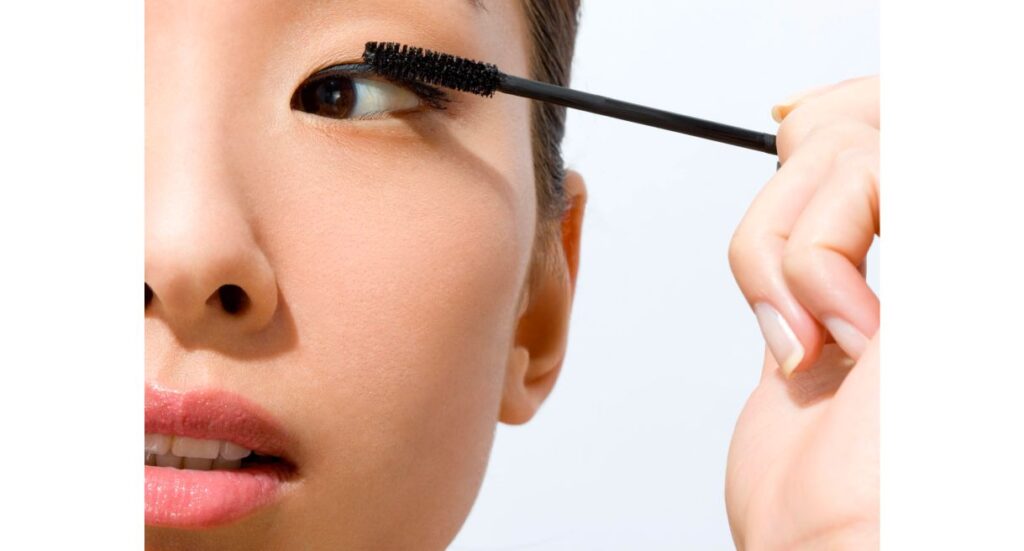
Step 5: Apply Mascara
Once both sets of lashes are on point, it’s mascara time! Coat those bad boys from root to tip. And if you’re feeling meticulous, run an eyelash comb through them for that extra oomph and separation.
>> Read more:
Step 6: Clean Your Curler
Regularly clean your eyelash curler to remove any mascara residue and bacteria. This ensures a smooth operation and prevents eye infections.
How Often Should You Curl Your Eyelashes?
Using an eyelash curler every day before putting on mascara is totally fine. But just like any beauty tool, it’s good to give your eyelash curler a break once in a while to make it last longer. Your lashes are always growing and falling out naturally, so using a curler daily is cool.
The American Academy of Ophthalmology says it’s normal to lose a few lashes each day (like 1 to 5). If you use the curler every day, just keep it clean and change the rubber pad every three months. This helps prevent germs from spreading and gives you the best-curled lashes. Easy peasy!
Wondering if Curling your Eyelashes can Damage Them?
Using an eyelash curler is a cool way to get those lifted, curled lashes that look awesome with mascara. Just make sure you’re using it right and not doing weird stuff with it, like having a dirty curler that could give you eye infections. But hey, in general, curlers aren’t the bad guys for your lashes.
Here’s the deal: as long as you’re using the eyelash curler the way it’s meant to be used, your lashes should be fine. Now, if you’re going all fancy with a heated eyelash curler, that’s cool too, but don’t go leaving it on for ages. Too much heat might give your lashes a hard time. Just stick to the temperature rules, follow the instructions, and don’t go overboard. That way, you won’t have to stress about losing your lashes just to get that awesome curled look.
Conclusion
In summary, knowing how to use an eyelash curler like a pro can really level up your makeup game! By following the tips we’ve shared, you can make your lashes look amazing and really make your eyes pop. Just be careful and take your time to avoid any accidents. With a bit of practice, you’ll become a curling expert in no time and rock those curled lashes with confidence!