+84 862 765 053
Lash extensions have become a staple in the beauty industry, providing individuals with long, voluminous lashes that enhance their natural beauty. One popular trend within the realm of lash extensions is the creation of spiked lashes, which add drama and flair to any look. Creating spikes for lash extensions requires precision and skill, but with the right techniques, anyone can achieve stunning results. In this comprehensive guide, we’ll walk you through the step-by-step process on how to make spikes for lash extensions, ensuring that you can achieve the desired look with ease.
Before we dive into “how to make spikes for lash extensions”,
What Are Lash Extension Spikes?
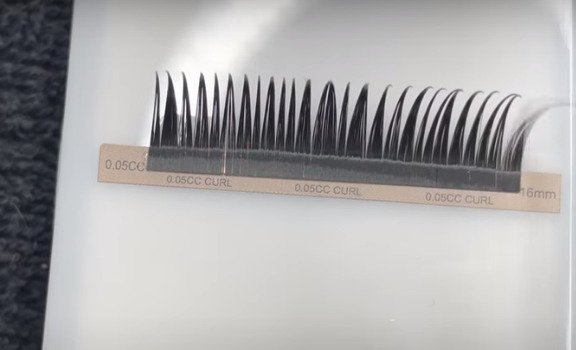
Lash extension spikes are an eye-catching addition to your lash extensions. These spikes are longer individual lashes or closed volume flares that create a textured and edgy look. Unlike the traditional lash extensions that maintain a uniform length, lash extension spikes have pointed or tapered ends, resembling threads. The lash artists strategically place throughout the lash line. Spikes help to extend beyond the base of the set and add depth and dimension.
In reality, lash extension spikes can be incorporated into various lash extension techniques, such as classic, volume, or hybrid sets, allowing for a customized and striking lash design. Whether you are seeking a dramatic appearance or a unique and textured style, lash extension spikes are a fantastic way to boost your lash beauty.

How to Make Spikes for Lash Extensions
1. How to make spikes for lash extensions by primer method
In the Primer Method, which involves the use of a lash primer, typically employed to cleanse and prepare the natural lashes prior to lash extension application.
Step 1: Separate With Primer
Dip a lint-free applicator into a lash extension primer, making sure it has a small amount of the product on it. Gently glide the applicator over the tips of the lashes, with a particular emphasis on separating and clumping them together. By doing so, the primer will assist in making the lashes cohesive and more manageable for subsequent steps.
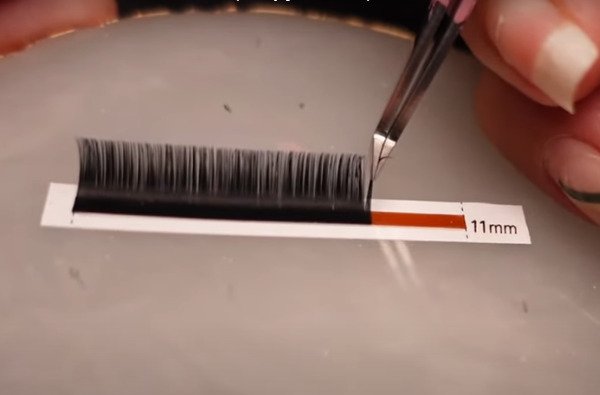
Step 2: Remove lashes from strip
With the aid of your tweezers, take care to meticulously separate a small clump of lashes from the lash extension row. Make sure to maintain their grouping and avoid any fanning out as you remove them. Choose lash extensions that are slightly thicker and longer than the rest of the other lashes in the set, to create the spikey and wispy effect.
Step 3: Dip in adhessive
Dip the base of each lash spike into lash adhesive, ensuring that you apply the adhesive only to the base and avoid getting excess glue on the lash fibers.
Step 4: Apply spike lashes
Refer to a lash map to determine the desired placement and arrangement of the lash spikes. This will guide you in determining the placement and arrangement of the lash spikes to achieve your desired style. Using your tweezers, carefully apply the lash spikes onto the natural lashes, ensuring they are positioned evenly and securely along the lash line according to your chosen lash map. Take your time and be precise in placing each lash spike for a beautifully textured and dramatic result. Lastly, use a lash comb or spoolie, gently comb through the spikes to fan them out and blend them with the natural lashes. This helps to soften any harsh edges and create a seamless transition.
2. How to make spikes for lash extensions by dipping method
Step 1: Grasp the Lashes at an Angle
Hold the lashes in front of you and use tweezers to separate the desired number of lashes for your spikey fan. Angle the tweezers so that they pinch the lashes closed as you hold them.
Step 2: Remove from the lash strip
While still holding the lashes with the tweezers, gently pull them forward and off the lash strip.
Step 3: Dip in adhesive
Dip the base of the lashes into lash adhesive, ensuring even application to the base. You can use a dispenser or a glue ring to hold the adhesive.
Step 4: Use or save
After completing the steps mentioned, you have the option to either use the lash spikes immediately or save them for later use.
Some Tips on How to Make Spikes for Lash Extensions
1. What thickness should I use?
2. Blending Lengths for Spiky Looks
To achieve the ideal spiky effect, it’s essential to blend different lash lengths. By adding shorter lashes (7mm to 9mm) for a subtle foundation and longer lashes (12mm to 15mm) for bold spikes, you can craft the perfect balance of contrast and intensity in your style.
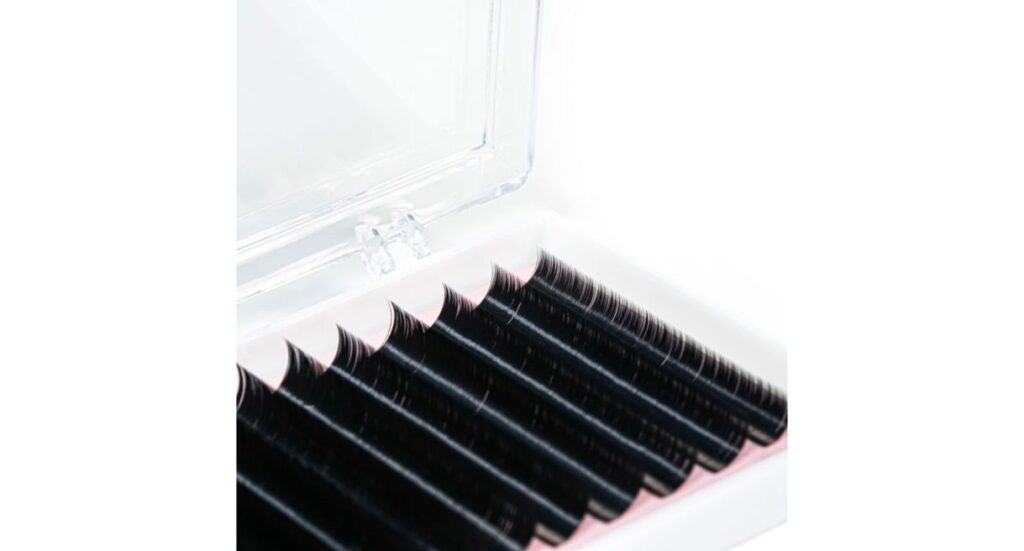
3. Selecting the Right Materials:
Use high-quality lash extensions that are lightweight and durable. Synthetic or silk extensions are commonly used for spikes due to their flexibility and ability to hold shape. Ensure you have a reliable adhesive designed specifically for lash extensions to ensure they adhere securely without causing irritation.
4. Lash Adhesive
If you’re a professional lash artist, it’s recommended to use fast-drying lash extension glue with a drying time of 0.5 seconds or standard-drying glue with a drying time of 1 second for creating wispy lash looks. These glues can enhance your application speed and provide excellent bonding.
If your client has sensitive eyes and skin, choose hypoallergenic glue for a safe and comfortable treatment. Hypoallergenic glue typically has a slower drying time of 3-5 seconds, allowing for more precise application and making it suitable for sensitive clients. It’s also suitable for beginner lash technicians.
>> Delve into our meticulously curated list of top-rated eyelash extension adhesives, complete with detailed information for each product: The Best Lash Glue Of 2023 – A Guide To Choose
Conclusion:
Achieving perfect lash extension spikes can be challenging, but with the right techniques and products, you can create stunning results. Learn how to use the primer method or dipping method for precise application. Follow our guidelines on lash thickness and adhesive selection. For a simplified lash creation process on how to make lash spikes, consider using Vietnam Lash’s Promade Spike Fans for exceptional and efficient results. Click here to find out about our promade spike lashes: Vietnamlash’s promade spike lashes
Don’t forget to visit our website to stay updated with valuable information at https://vietnamlash.com/