+84 862 765 053
Hey there, lash lovers! Let’s talk about the latest craze sweeping the beauty world: wispy lash maps. If you’re anything like us, you’ve probably been seeing these fluttery, dreamy lashes all over your Instagram feed and wondering what the fuss is all about. Well, buckle up, because we’re about to break it down for you.
What is a Wispy Lash Map?
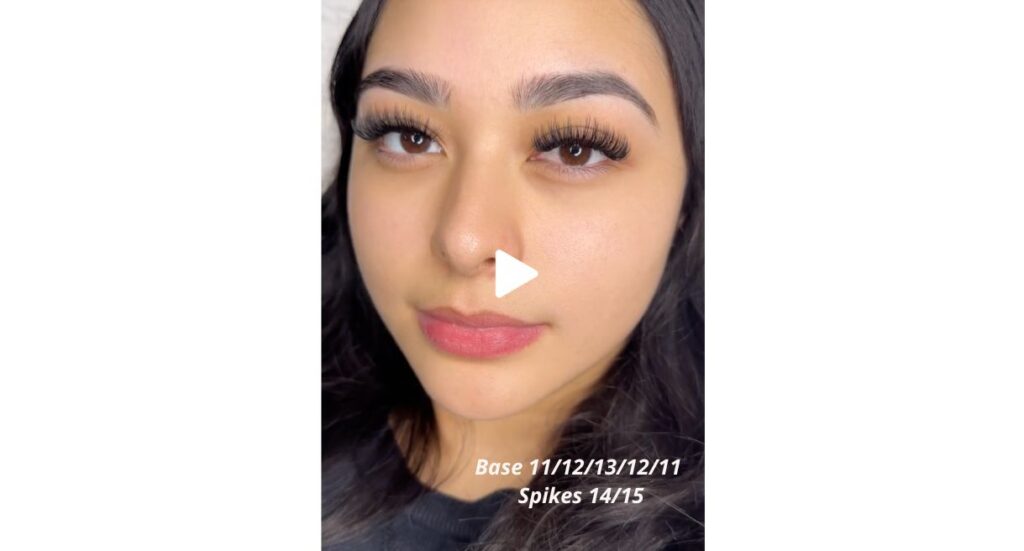
Wispy lash map is a technique used in the lash extension industry to plan and determine the placement of lash extensions for achieving a wispy, textured look. It involves mapping out the lash design by considering factors such as lash lengths, thicknesses, curls, and the strategic placement of volume and spike lashes.
The purpose of a wispy lash map is to create a customized lash set that enhances the client’s natural eyelashes and eye shape while achieving a feathery, wispy effect. By carefully analyzing the client’s eye shape, desired outcome, and natural lash characteristics, a lash technician can plan the lash mapping accordingly.
Key Elements of a Wispy Lash Map:
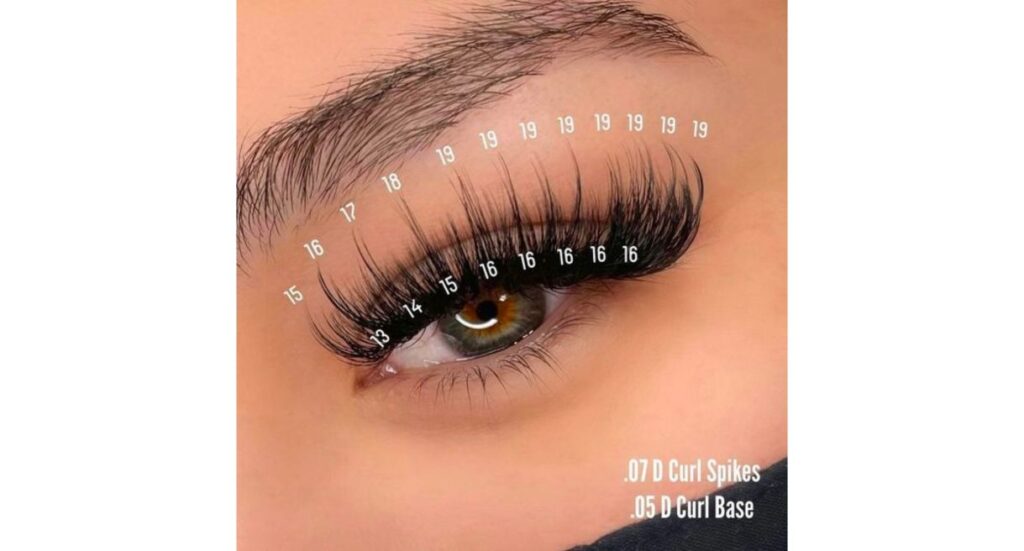
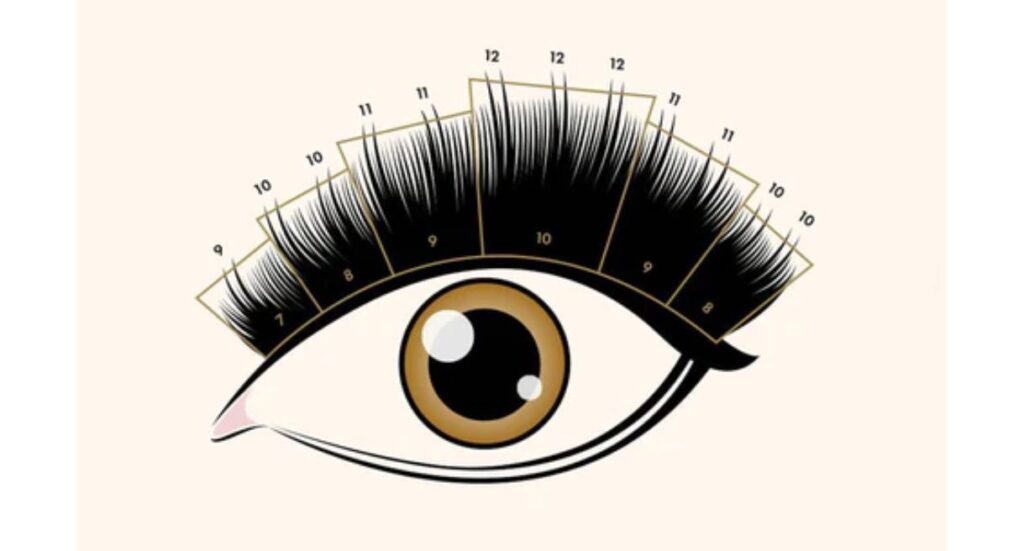
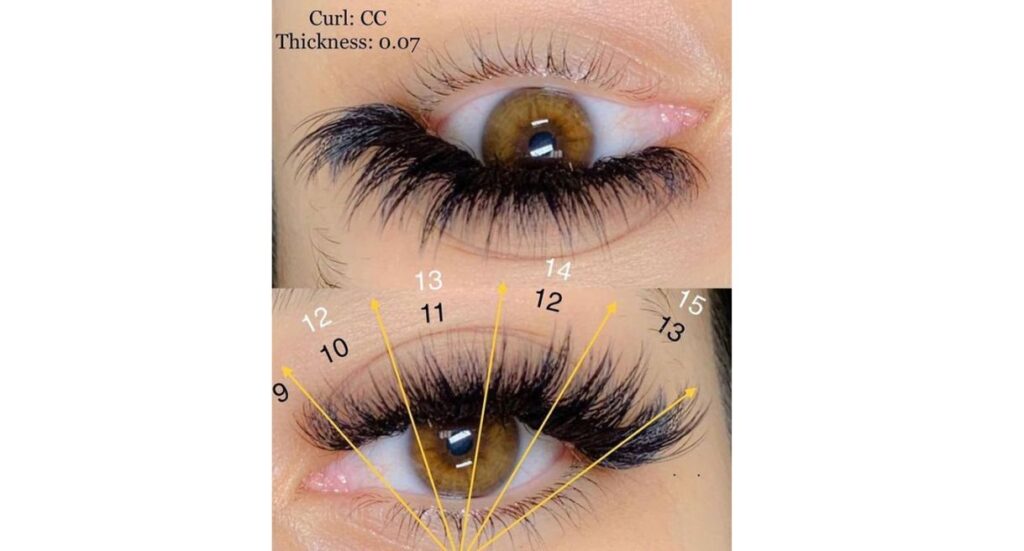
- Lash Length Variation: To create a graded, wispy impression, learn various lash extension lengths, from shorter to longer. Arrange different lengths in a deliberate manner to resemble the organic growth pattern of eyelashes, giving the appearance of featheriness.
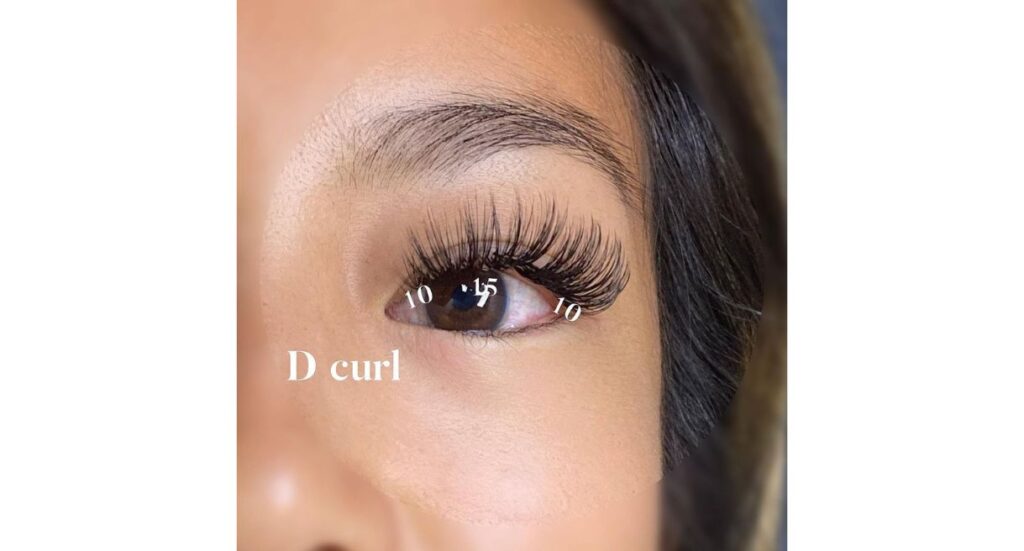
- Curl Designs: Understand the different curl patterns (J, C, and D curls, for example) and how they affect the overall appearance of wispy lashes. Expertly combine curls to create a soft, whimsical curl pattern that adds to the wispy appearance.
- Density Distribution: Learn how to space out lash extensions so that the effect is subtle and uncluttered, without appearing heavy or overdone. From the inner to the outside corners, gradually add density to create a wispy, ethereal impression.
- Client Consultation Skills: It is essential to understand the preferences, style, and desired level of wispy effect of your clients. Assist clients in balancing their expectations with realistic results by educating them about the potential and constraints various wispy lash mapping approaches.
- Mapping Techniques: Use basic mapping techniques to plan the placement of extensions while taking the natural lashes, eye shape, and desired wispy look into account. Tailor the mapping to attain a range of lengths and curls, guaranteeing a soft and airy look.
- Techniques for Layering and Feathering: Use efficient layering strategies, starting with spikes and progressively adding layers of extensions. For a wispy finish that enhances the light and airy impression, place shorter lengths closer to the inner corners and longer lengths toward the outer corners.
What You Need For a Wispy Lash Map
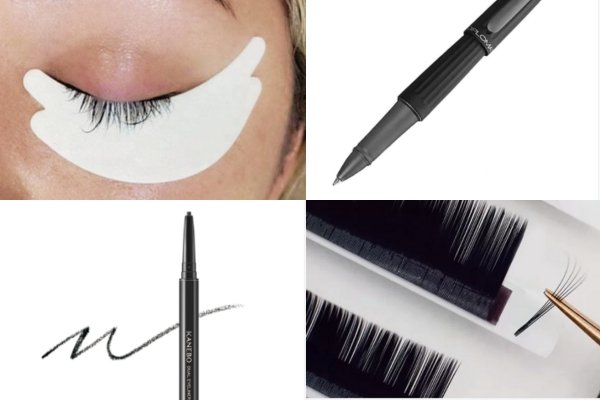
- Eyeliner or pencil: This is used to map out the lash design on the skin. It helps you plan and visualize the placement of lash extensions.
- Eye Gel Pads: These pads are placed on the bottom lashes to protect them during the application process. They also provide a surface to draw the lash mapping lines on.
- Pen: A red pen is recommended for lash mapping as it provides good contrast against the natural eyelashes when drawing on the eye gel pad. However, a black pen can also be used, although the lines may be less visible. Choose the pen color that works best for you and allows you to clearly see the mapping lines.
- Eyelash Extensions: Different types of eyelash extensions, including various curls and lengths, are necessary for wispy lash mapping. These extensions will be applied based on the mapped-out design, creating the desired wispy effect.
Common Wispy Lash Map Types
Different kinds of mapping are needed for each set of lashes. The four most popular kinds of wispy lash maps are listed here.
01: Kim K. Wispy
This wispy lash map is inspired by Kim Kardashian, as the name would imply. Because of the reality celebrity, the Kim K wispy lash extensions are currently the most popular kind.
The lash rays should be around 2-3 mm longer than the main set. Keep the quantity of rays per eye to 7–10 to prevent packing the lashes too densely. Make sure the spikes on both eyes are equally spaced and at the same distance from one another because symmetry is important. Spikes should be kept at least 4–5 mm away from both the inner and outer corners.
>> Dive further into this swoon-worthy lash style: Achieve The Look: Kim K Lash Extensions
02: Wispy Doll Eye
This form of wispy lash provides you with doll-like eyes. With this technique, longer lash extensions are placed over the iris in a strategic manner, and the extensions are then gently dropped down on the inner and outer corners.
The result is eyes that resemble doll eyes in that they appear larger and rounder!
If you choose lash lengths that are too long, it can seem very dramatic, but it also works well on hooded or almond-shaped eyes.
>> Wish to know more about Doll Eye Lash Extensions, wait no further:
Elevate Your Beauty with Doll Eye Eyelash Extensions
03: Wispy Open Eyes
Because the extensions are visible, the lash placement on the lash line in the open-eye wispy lash mapping helps open up the eyes. Given that people with hooded eyes typically have hidden lash lines, mapping becomes even more crucial when creating this type of lash effect.
For those with hooded eyes, long, thick lashes work better when applying the open-eye approach. To get the ideal wispy effect, you can also apply lash extensions of varying lengths.
04: Wispy Cat Eye
The cat-eye style has always been popular! The outer corners of the eyes appear dramatic and stretched when using cat-eye wispy mapping, just like a cat’s eye would. Near the outer corner of the eye, these fluttery, winged lashes usually have longer, thicker, and more curled lengths.
With the Cat Eye lash mapping process, the lash extensions are first applied shorter, then progressively longer, from the inner corner of the eye toward the pupil, and lastly, significantly longer, towards the outside corner. This method helps rectify the look of close-set eyes by making the eyes appear wider.
>> Achieve Captivating Eyes with Cat Eye Eyelash Extensions
Tips for Creating Wispy Lash Map
– Embrace initial failures as part of the learning process.
– Keep practicing diligently; perfection comes with persistence.
– Let your creativity flourish in designing unique wispy lash maps that could gain popularity over time.
Conclusion
Mastering the art of the wispy lash map requires skill, precision, and a keen eye for detail. By understanding the key elements and techniques involved, lash artists can create stunning, customized looks that enhance their clients’ natural beauty and leave them feeling confident and glamorous. Experiment with different lengths, curls, and placement strategies to discover your signature wispy lash style and delight your clients with mesmerizing results.
Lastly, don’t forget to stay updated with useful information and the best products on our website at https://vietnamlash.com/.